Posts

Showing posts from 2017

Balsa Wood Sculptures

Image
Process Title: Focal point, Repetition, Texture Materials: Balsa wood, wood glue, paper, masking tape Dimensions: 4" x 4" x 1",  2" x 2" x 5",  3.25" x 2" x 6" Result Focal Point Repetition Texture Statement           Focal Point: While there's a lot going on in this sculpture, I wanted to try and get as many of the lines as I could point toward the center of the ring. I used wood glue, balsa wood, and paper.           Repetition: I took balsa wood shavings and delicately glued them together, starting from the middle and building outward. It creates a fountain effect, with the repeating lines and curves.            Texture: The center was a mixture of wood glue and balsa wood. The front in peeled back, revealing the inside, where the balsa wood shavings are stuck in the glue, creating a jagged texture. However, on the other side of the piece, those same wood shaving are encased in the wood glue and hav
Memento

Image
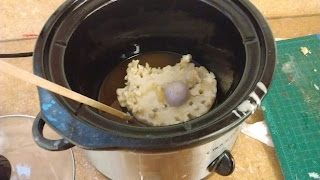
Process           This actually took a lot longer to make than I originally anticipated. I wanted to make a sort of fake rock, so I sanded down a piece of scrap foam until it was an egg-like shape. Then, in order to get the hard and glossy outside, I used beeswax. However, beeswax is very pliable when held for a while and heated up by the hand. Unlike a rock, it has a warm feeling, and gets sticky after a little while. So I was forced to scrap the beeswax idea, even after spending several class periods trying to make it work.           Instead, I coated the piece of foam in plaster and let it dry. Then I coated it in plaster once more to be safe. Afterward, I sanded it gently to make any new rough edges smooth. This not only created the smooth, rock-like texture I was looking for, but also make it slightly heavier (although not nearly as heavy as a rock would be), and it was it cold to touch, which it exactly what I was looking for.            Next, I covered the whole thing in

Soap Sculpture

Image
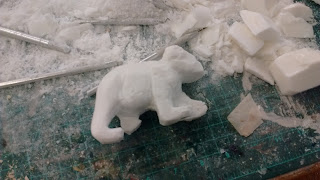
Process Title: Soap Bear Materials: Soap Dimensions: Larger bear: 4.5" x 1.5" x 2.5" Smaller bear: 3.25" x 2" x 1.5" Result

Masking Tape Shoes

Image
Process Title: Tape Shoes Materials: Masking tape Dimensions: 11" x 3.5" x 4" Result

Map Relief

Image
Map Relief Process           I began with two pieces of scrap foam that I found in a bin, and I glued them together using wood glue and wooden rods for support. Once I had a secure form, I used a small saw to create an organic shape, and sanded the corners to make it less angular.            Once I had my shape, I covered the whole thing in several layers of gesso to make it white and paintable.            Then I began working on the different sections. For the top, I rolled tracing paper very tightly and dipped it in a mixture of scarlet, orange, and brown ink to create a blood-like color. I would end up using this color for the veins painted on later. Once I had my tendrils, and they were dry, I began gluing them on. Note: The gel medium causes the ink to bleed. If anyone is planning on emulating any of this in the future, don't use the gel medium as an adhesive if you don't want ink to escape onto your surface. So instead of that, I used book glue I found i

Masked Identity

Image
Process           This was a lot easier to do than I thought it would be. I wanted the mask to fit my head, so I had to do a lot of measuring, which was probably the bulk of the work to create the mask. The first thing I did was measure from the tip of my nose to the crown of my head. Then I cut a wire to that length and curved and taped it to create a loop. This was my starting point to expand upon. After that, I did one across the top of my head and in front of my face. Then I started adding wires down the sides of my face, creating a ribbed structure, making sure I measured each piece on my face before cutting. Because I made sure to measure everything, it came out fitting perfectly. Maybe a little too perfectly. If I were to do it again, I might be a little more lenient on the accuracy of the measurements, maybe giving a quarter of an inch here and there, so that I could put my hair up into the mask, or so other people could wear it.            After the metal skeleton was